You're viewing old version number 31. - Current version
Junco User Documentation
http://jothut.com/cgi-bin/junco.pl/blogpost/5499/17Oct2013/In-Progress-Junco-enduser-testing
Junco was designed to support multiple users who can follow users and tags and add replies. But in the example usage below, the app is used as a one-person personal publishing site. The documentation, however, will explain usage as if multiple people used the app.
Example usage: http://jothut.com
Account Creation
A new user enters a username and a valid e-mail address. The system sends the user an e-mail with an auto-generated password and a link to activate the account. After the account is activated, the user can login.
Changing Password and E-mail
After logging in, the user can click on his or her username and follow the link and form fields to change the password and e-mail.
Generate New Password
On the login page, a user can request the app to generate and email a new password.
Editing the Profile Page
Users can personalize their profile page by adding links, plain text, or Textile markup to create HTML. The profile page data entry box supports template includes and the double-bracket wiki link feature.
Search
The search applies to microblog posts, blog posts, replies, webmentions, all content posted, except blog posts that have had the private=yes command applied.
In the text input field box for searching, enter one of the following:
- the search term(s)
- the search terms separated by AND
- the terms separated by OR
The AND-OR operators need to be typed in uppercase.
On a search results page, a permalink for the search is displayed with a pound sign link, and an RSS link also exists for the search results. The RSS feed contains the 20 most recently created/updated blog and microblog posts.
This simple search may need enhanced because it will return results that contain part of the search term. For example, a search on the word "junco" will also return results that contain the phrase "juncocode."
Hashtags
Microblog posts (notes) and blog posts (articles) are limited to a max of eight hashtags.
Hashtag format consists of meaningful, categorical, alphanumeric text preceded by the pound sign.
Hashtags are used to organize and identify content. Tags help with searching.
I like to start with the general and move to the specific when including tags.
Examples (with the pound signs excluded):
- nature - insects - butterflies
- sports - football - nfl - browns
- media - design - mobile - app
A "tags" link exists to show all microblog and blog postings with tags. The tags can be displayed by name, count, tag cloud, and the top 30 tags.
A max of eight tags are permitted per post.
An RSS feed can be obtained for each tag. The feed shows the 20 most recently created/updated posts.
Displaying posts that contain a particular hashtag is really a special form of the search function.
The AND-OR operates can be used with searching or displaying a stream of tagged posts.
Example URL:
Microblog Posts or Notes
These are short posts with a limit of 300 characters. They are entered in the small textarea box, located on the homepage.
Titles are not entered.
No preview, just a post button.
The only formatting includes:
- Raw URLs are converted into clickable links.
- Hashtags converted into clickable search links.
/1234/means linking to another microblog post that has ID number 1234.
These posts cannot be edited.
But microblog posts can be deleted from the home page stream by clicking the [delete] link. The post is not removed from the stream. A deleted post can only be viewed on the home page stream by the logged-in owner. The deleted post will appear with very small text with a light yellow background. The deleted post can be added to public viewing by clicking the [undelete] link.
The RSS stream for a user's microblog posts can be accessed on the user's profile page.
Blog Posts or Articles
These can be short or very long.
Posts can be entered in a medium-sized textarea box, or the enhanced 'editor' can be used.
Blog posts can be previewed before being saved.
Blog posts can be edited.
Versions
Old versions are preserved. To revert back to an old version, the user edits the old post and saves the post.
Differences
Differences can be run on two versions, showing changed, additions, and deletions.
Titles
No separate input text field exists for the title. The first line in the blog post is used as the title. If the line is long, then the first 150 characters will be the title.
If the title contains a colon punctuation mark, then the text preceding the punctuation mark must equal the username of the user creating the post. This namespace convention allows users to create common titles with their username in the title.
If a blog post is created with a title that matches an existing post that was created by any user, then an error will be displayed.
Markup Support
Blog posts support Textile, Markdown, and MultiMarkdown formatting. Textile is the default markup.
Many HTML tags are also supported.
Blog Post Types
Blog posts can be set to private where only the logged-in owner can view the post. It will not appear within the logged-in owner's home page stream. The owner can access private posts through the user's profile page.
Blog posts can be set to draft where they are still publicly displayed, but draft posts do not appear on the home page stream. Draft posts could be found through searching. The owner can view a stream of draft posts via the profile page. Draft posts are automatically created when the double-bracket wiki markup is used, and the post identified by the title contained within the double brackets does not exit.
Table of Contents
If header lines are used within a blog post, then by default a table of contents is created and displayed at the upper right area of the page. The table of contents display, however, can be disabled.
Viewing Blog Source
Users can view the markup source for a blog post.
Related Articles
Based upon the hastags used within a blog post, a list of "Related articles" is displayed at the bottom of the blog post. This list is generated when two or more hashtags match other blog posts. Five related articles are displayed. If more than five exist, a "more" link is displayed that will take a user to the page that shows all the related articles. This feature not apply to nor include microblog/notes postings.
Blog Posts Stream
When showing a stream that includes blog postings, only the first 250 characters of each blog post is displayed within the stream. If the post is longer than 250 characters, a "more" link is displayed.
Blog posts can be deleted from the home page stream by clicking the [delete] link. The post is not removed from the stream. A deleted post can only be viewed on the home page stream by the logged-in owner. The deleted post will appear with very small text with a light yellow background. The deleted post can be added to public viewing by clicking the [undelete] link.
RSS
The RSS stream for a user's blog posts can be accessed on the user's profile page. The feed contains the 20 most recently created/updated blog postings (articles).
Archives
The "archives" page only applies to blog posts.
Special Blog Formatting Tag
The blog_[username] hashtag is used to create a specially formatted stream of blog postings. Only the author's username can follow the "blog_" text when using this hashtag. After clicking on this special tag, the formatted stream will look more like a traditional blog home page.
It's recommended to use the "more." command when applying the "blog_" hashtag. The text preceding the "more." command will appear on the specially formatted blog home page stream. On the blog home page, the "more" link will be displayed to indicate more text exist. If the "blog_" tag is applied to a post, and the "more." command is not used, then the entire blog post will be displayed on the specially formatted blog home page stream, which may be desired for small posts.
The home page stream for this special tag displays posts by creation date. Recently updated blog posts do not appear at the top of the stream, which is what happens on the normal stream display for blog/article postings.
This special tag also includes an RSS feed that displays the 20 most recently created blog postings. Again, recently updated blog posts do not appear at the top of the RSS feed.
The special "blog_" tag attempts to preserve traditional blog functionality.
Image Headers
These commands apply to blog posts that use the special "blog_" tag.
or
The large image is displayed when viewing the blog post.
These large images, however, are not displayed when viewing the stream of specially formatted blog posts.
Redirecting
A blog post can be made to redirect to another posting by using the at-sign at the beginning of a line, followed by the blog post ID number of that a user should be redirected to.
Power Commands
These commands typically start at the beginning of a new line. Most take either a "yes" or "no" option.
- toc=yes|no
- draft=yes|no
- replies=yes|no
- private=yes|no
- showintro=yes|no
- code=yes|no
- markdown=yes|no
- multimarkdown=yes|no
- webmention=yes|no
- imageheader=URL
- largeimageheader=URL
Embedding Media
The img HTML tag is permitted.
Markdown and Textile provide commands to display an image.
These custom commands are used to display other media: #todo show example usage
- gmap=
- kickstarter=
- facebook=
- youtube=
- vimeo=
- gist=
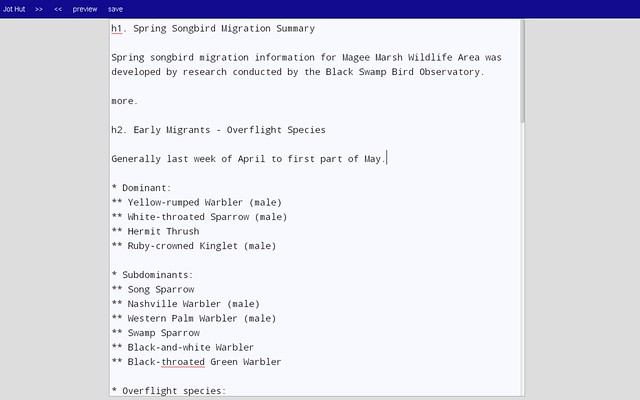
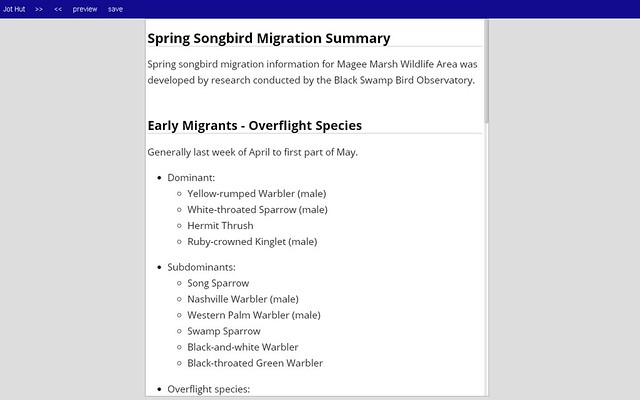
Enhanced Blog Writing Area
Can type and view in split-screen or single-screen modes.
Auto-save occurs every five minutes, provided that at least one key was pressed. The "save" link can be clicked to save too.
If the "preview" link is clicked while in split-screen mode, then the preview will be displayed in split-screen mode.
If the "preview" link is clicked while typing in single-screen mode, then the preview will be displayed in single-screen mode. This preview will display at the same width as the website's width defined in the CSS file.
Click the right arrows changes the mode to single-screen. Clicking the left arrows switches to split-screen mode.
This does not contain live preview. When testing, I found live preview to be too distracting. I could see letters flashing onto the preview part of the screen out of the corner of my eye as I typed. Plus, I have added too many custom formatting options, such as custom Textile-like formatting commands, template includes, etc., that are best achieved with a round-trip to the server. Since this round-trip is plenty fast, I don't see this as a problem.
Keyboard Commands
- ctrl+P = preview
- ctrl+U = single-screen mode
- ctrl+S = save
Old screen shots
split screen, typing on left and preview on right.

single screen view for typing.
single screen view for previewing.
When moving away from the enhanced writing area, you will get a pop-up message, asking if you want to leave the page. Click "confirm" or whatever the answer is to leave the page.
This confirmation pop-up will appear even after you have saved the content.
This confirmation exists because over the years, I've experienced times where I accidentally moved away from a page that I was adding content to, and when I quickly moved back, all my content was gone and not saved. So I added this pop-up to my new app as a safety feature.
This "confirm" pop-up does not function on Apple devices.
Simpler Enhanced Writing Area
It's also possible to simplify the enhanced writing area even more. These views borrow from the writing area at Github. These actions only exist as keyboard commands. When writing in this simpler, enhanced view, the above keyboard commands can be used too. And the other actions, such as autosave also works here. It's the same JavaScript editor code.
- ctrl+J - bare display that shows only the single textarea box for writing. no border, no nav bar, no buttons, no links.
- ctrl+H - bare display per above except textarea box is only five lines tall.
- ctrl+D - change display from dark text on a light background to light text on a dark background.
- ctrl+B - reverts back to the original splitscreen display with original colors, buttons, etc.
From JR's : articles
2028 words - 12295 chars
- 11 min read
created on
updated on
- #
source
- versions